|
|
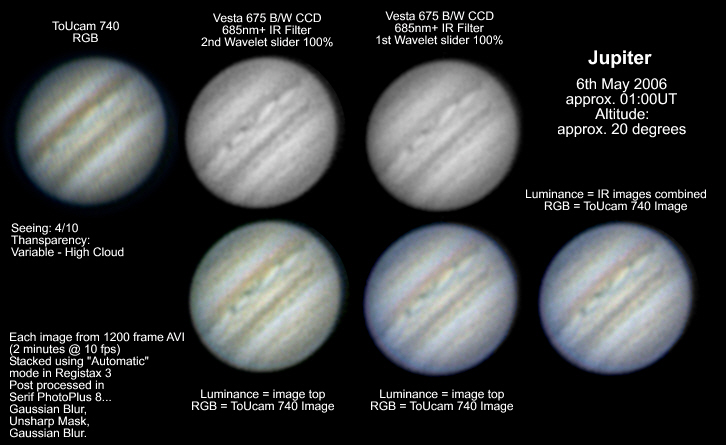
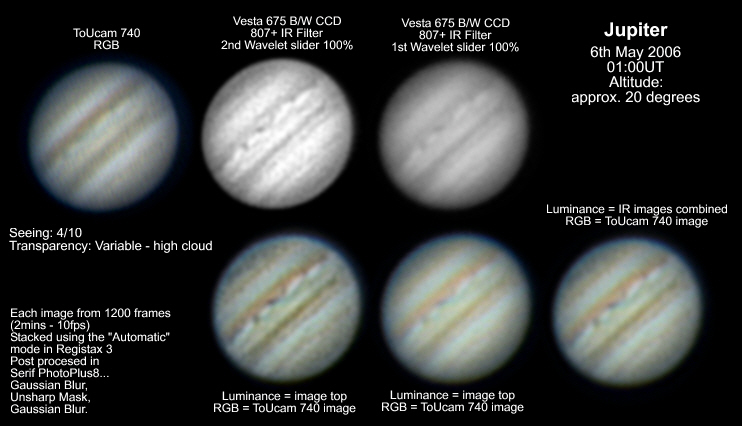
6th May 2006, 01:30UT
These are my first images of Jupiter for 2006. From here in the UK the planet will only reach about 20 degrees altitude this year, at best. As a result any turbulance in the atmosphere is going to be a problem. In an attempt to combat this problem I have tried imaging in IR light. I have three IR pass filters, a home made "exposed film" IR pass filter, A wide band near IR filter (685nm +) and a deeper IR pass filter (807nm +).
I experimented with the 685nm+ filter and the 807nm+ filter and also tried using the result as a luminance layer, adding colour from a standard ToUcam 740. The hard part is taking the AVI's close enough together so that the planets rotation isnt too much of an issue.
There was a problem with high cloud which made the light levels for the 807nm filter challenging. However I did get the occasional brighter moment for imaging with filter. It is so far into the IR band that the sensitivity of the webcam is much less than the 685nm+ filter. This makes for a noisier image.
Although the final images are not as good as last year, due to the low altitude of the planet, the IR images are a signifcant improvement over a straight ToUcam RGB image.
|
|
|
|
|
|
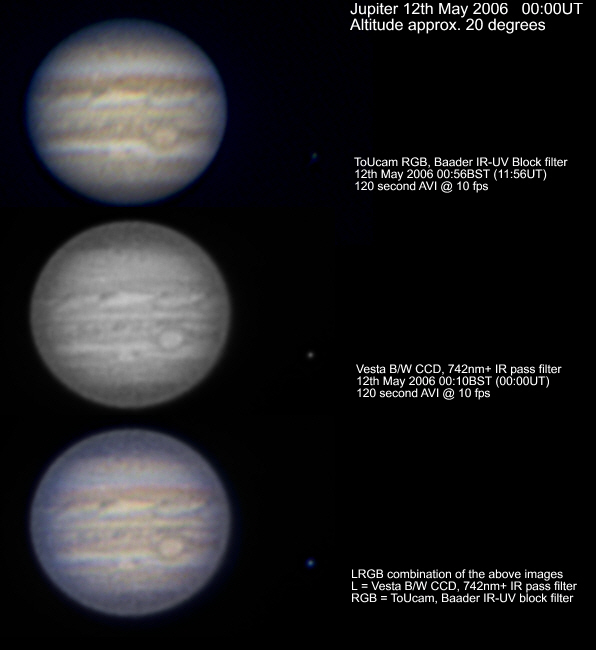
Jupiter 12th May 2006
Despite the low altitude (20 degrees) the seeing was pretty good this night (bad weather on the way). The transparency was good too.
Again an RGB and an IR image, this time with a 742nm+ IR pass filter.
The telescope was my 222mm F8 Newtonian,
2 x Apo-Barlow and 37mm extention tube
(Effective focal ratio of F25)
Roll over the image to see some of the features highlighted. In particular this is my first image of the storm dubbed "Red Jnr." A smaller version of the Great Red Spot storm system that has developed over the last few months to a year.
Of the three IR pass filters, on limited experience I would say that this will be the one that I will use the most...
The 685nm+ filter gives bright images but is a little more succeptible to atmospheric seeing problems.
The 742nm+ filter is still quite bright but less succeptible to poor seeing.
The 807nm+ filter is very good at beating the seeing conditions but the lower light levels make for a noisier image. With a larger telescope, I imagine this filter would be superb.
Filters are available from here: http://www.modernastronomy.com/filters.html
|
|
|
|
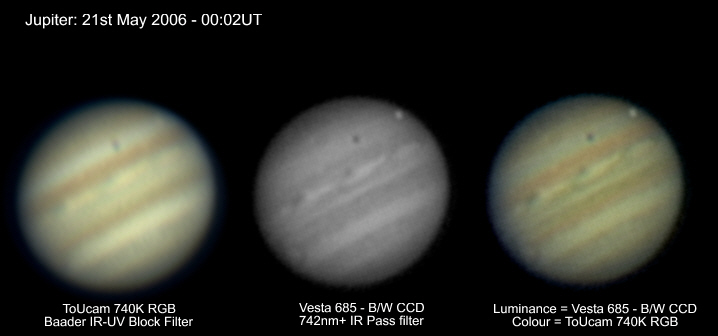
21st May 2006
I was surprised to see clear skies this evening.
I took several images using different filters. The best were with the 742nm+ near infrared filter, see the image opposite.
The moon is Ganymede and also visible is it's shadow. You can see the Great Red Spot just beginning to rotate into view.
Roll over the image to see the features labelled.
|
|
|
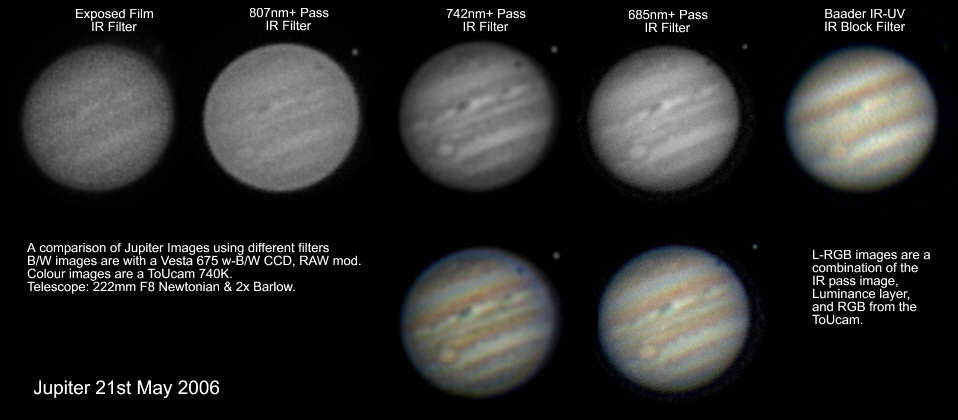
Again from the same night I have done a comparison of the different filters I have available. By this stage the conditions were beginning to worsten, with seeing beginning to deteriorate. Both the exposed film filter and the 807nm+ filter caused the webcam to struggle for available light. As a result I think I failed to focuse the image properly for the Exposed film IR image. Even with gain at full, for these filters it was a poorly defined image. Both the 742nm+ and the 685nm+ filters improved the quality of the image. The 742nm+ filter shows the most contrast, while the 685nm+ filter is better for detail. The 742nm+ filter image could not be processed using the first wavelet slider in Registax due to noise, where as the 685nm+ image could - this almost certainly accounts for the finer detail in this image. It is also interesting to note that Ganymede is all but invisible on the ToUcam RGB images but quite obvious in the IR images.
|
 |
|
|
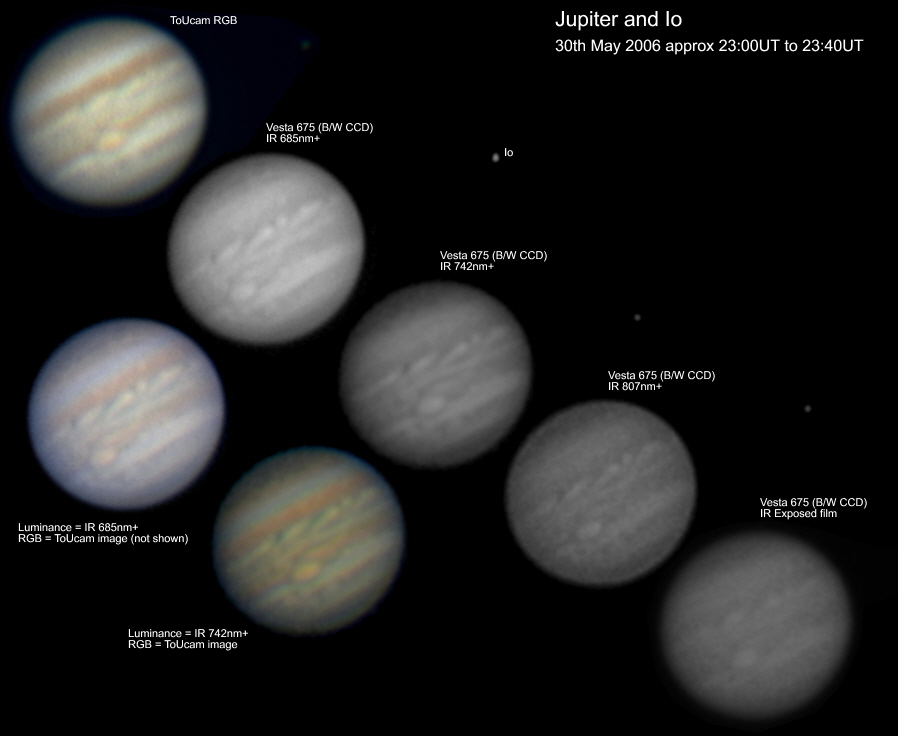
Jupiter 30th May 2006.
Another unexpected chance to image Jupiter. I was gifted about an hour of clear skies. I took the opportunity to image the planet at different wavelengths if IR again to get a better feel for the perfomance of the different filters. I compared the commercial IR pass filters: 685nm, 742nm, 807nm and also a DIY exposed film IR pass filter. The telescope used was a 222mm F8 Newtonian with a 2 x Barlow extended by 37mm. This give an F ratio of approximately F25.
Again it appears that the 685nm+ and the 742nm+ filters give the best image. The 807nm+ filtered image suffered from low light levels, however the image was significantly less turbulant than the wider band filters. The light levels from the DIY exposed film filter were extremely low, making focussing very difficult.
Move the mouse over the image to remove the labels.
|
|
|
|
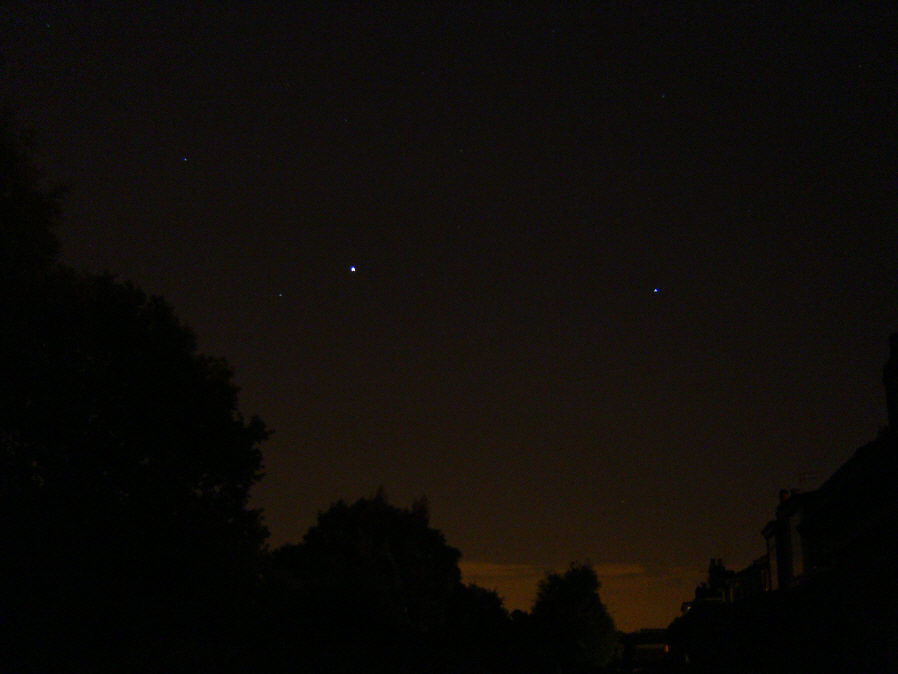
To give an idea how low Jupiter is in the sky, the image below is a 7 second digital camera image pointing roughly south south west. Roll over the image to see labels. Anything East of south is obscured by trees from my location but West of South is a very low horizon.
|
|
|
|
|
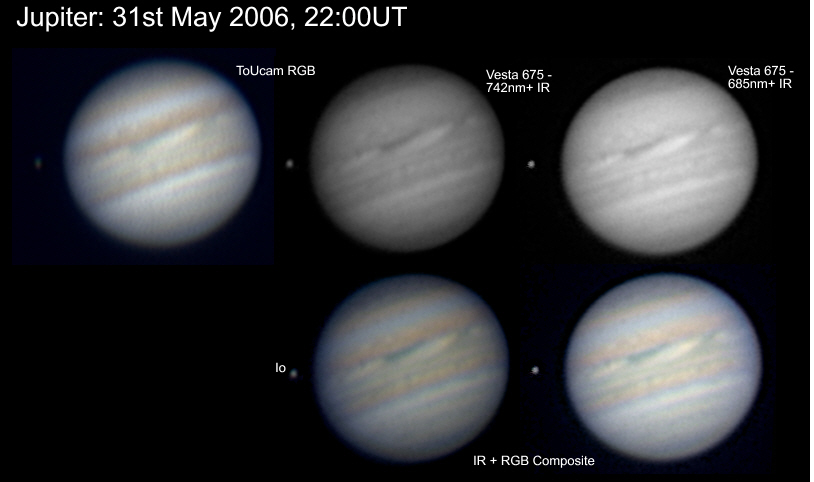
I took a few mnutes to image Jupiter on the night of May 31st. Again the seeing was poor due to the low altitude of the planet. IR filters again improved the image somewhat. This is the "boring" side of the planet, i.e. no Red spot or Red Jnr.
|
|
|
|
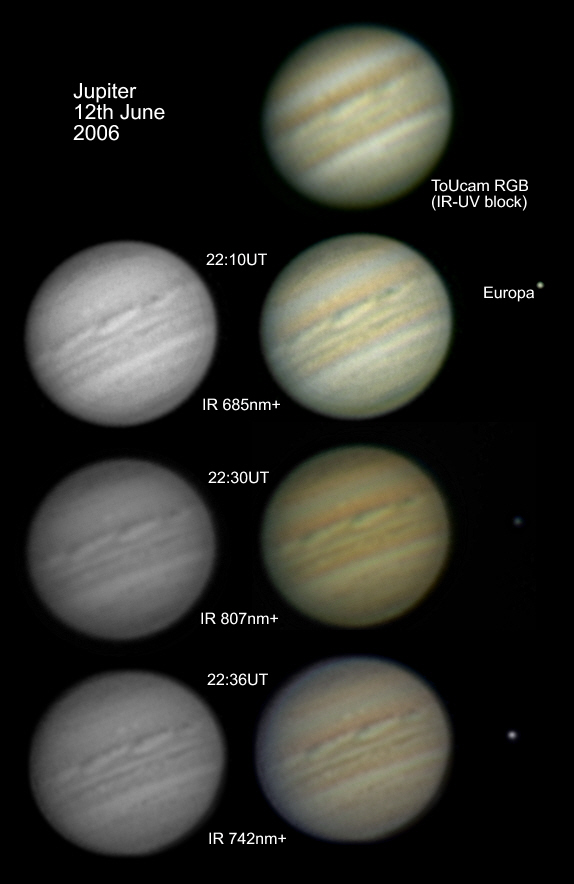 |
Jupiter: 12th June 2006
Back from my holidays and Jupiter is peeping out from behind the trees a little earlier now. It's probably posiible to image from about 22:30BST (British Summer Time - UT+1).
Again I used the IR technique to improve the detail in the images. I think todays winner is the 742nm+ filter. This image shows the most fine detail, while all the IR composite images give much more detail than the a straight ToUcam RGB image.
Again note how much brighter the moon (this time its Europa) is in IR light. The moon is visible in the top RGB image but only just.
The forecast for the next few days is promising so hopefully I will get an image of Red Jnr to enable me to see just how close it now is to the Great Red Spot (GRS).
It's expected to pass the GRS during July.
|
|